
The use of sight can considerably increase your shooting performance. The sight is an accessory used to point your bow at the target. Behind this apparent simplicity hides a multitude of subtleties. Among the accessories for archery, the sight is undoubtedly one of the most used, but unlike others, adjusting it is not easy: it is not enough, in essence, to mount it on the bow. So let’s see some useful principles to keep in mind to understand how to adjust the viewfinder. The sight is an evolution of the modern bow found on recurve bows and on compound bows.
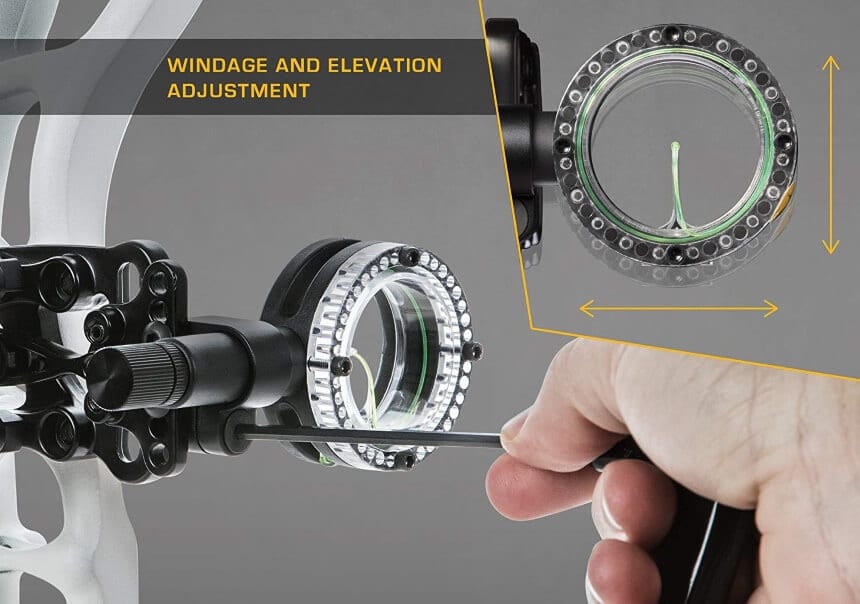 There are several models of bow sights, but many of them respond to similar mechanisms. In general, not particularly complex viewfinders have a single pin to be kept in mind as a reference point when making the various, inevitable, adjustments. The pin is unscrewed and screwed and thereby moves to the right or left. At the same time, it can also be repositioned higher or lower. Then it needs several tests to calibrate well the pin and, therefore, the viewfinder so that it can provide effective help in the moments preceding the award, and then you release the arrow.
What needs to be done is to vary the position of the pin in relation to the results obtained during the shooting sessions, In particular, move the pin to the right in case of impacting arrows too far to the right, upwards in case of impacting arrows too high and so on, according to a simple mechanism which nevertheless requires numerous tests and adjustments.
To establish the need to adjust your bow sight, you must determine the range from which you will shoot. A close range is more suitable to start to test for the appropriate range when using multi-pin scopes; you then walk your way backward while aiming. For a newly set up scope, however, you can move towards, then gradually move away from the target to align the scope.
Three shots of the same arrow types are fired at the target to hit a similar point, this is to ensure no shot was just an outlier, but it is a function of what is wrong with the bow. The relationship of the position of the arrows determines your aim determines what is to be done next. The crosshair should be moved along the direction of the arrows – whether the arrows are positioned left, right, up, or down.
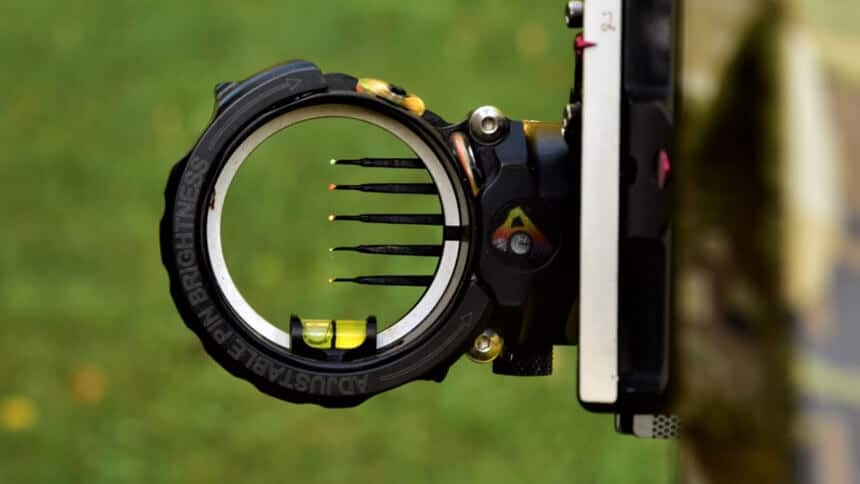 The multi-pin sight has three principle bearings of change: you can move the sight ring left, right, up, and down. You can move the pins north and south.
Utilize the top pin for the briefest distance and the base pin for the longest. In the first place, focus on the top pin for most bowmen from a distance of around 18 meters, yet you should begin changing from 9 meters.
Discharge three shots and afterward extricate the screw that permits you to move the extension ring left and right. Move the sight ring towards the gathering, if necessary. Shoot three additional times to check the setting; repeat if vital. At that point, change the vertical until your gathering hits where you point. The top pin ought to stay in the top third of the degree ring; in the event that you need more space to move the pin, relax the screw that permits you to move the extension ring all over. Change the ring and afterward change the degree by moving the pins.
Move 25 meters, point your pin for 18 meters, and shoot another gathering of three bolts. In the event that you don’t see the bolts falling altogether descending, venture back 30 meters. Shoot in a gathering and move the second pin up or down until your bolts hit the objective. Proceed with this interaction for the following extension pins.
Also, you must be aware of the quality of the multi-pin sight you are using. A pin sight of good quality will achieve efficient results when used effectively, unlike those of suboptimal qualities. As a multi-pin model, we highly recommend the Trophy Ridge Volt, and we also suggest that you check out the best multi-pin models available in the market here.
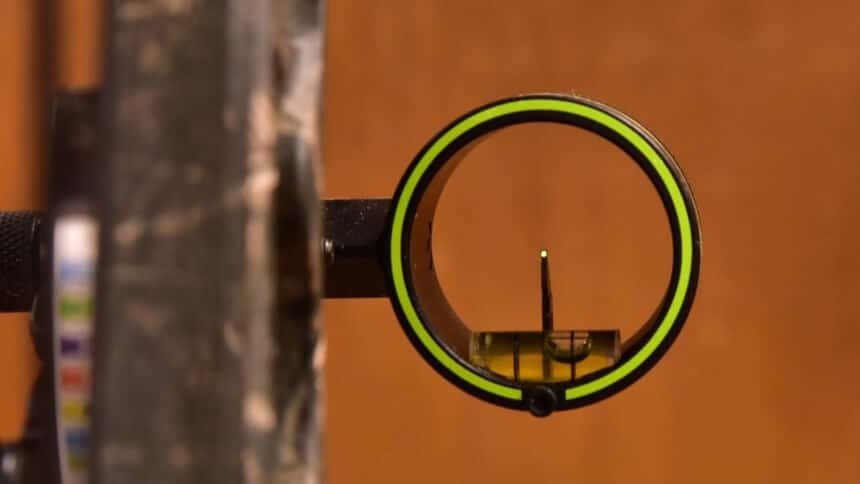 To make an osprey or single-pin scope the focus, begin shooting from a distance of 9 meters with a gathering of three bolts. Extents of this kind have two changes: even, which moves the pin to one side or right, and a vertical one, which moves up or down. Move the sight towards your “control” bunch until your bolts start to hit where you point.
The setting strategy and approaches rely upon the sort of shooting, regardless of whether you are shooting sports at a similar distance or chasing at various distances.
In the event that you shoot one distance, change the extension by making changes bit by bit as you shoot. These changes don’t need to be tweaked until the toxophilite is at the ideal distance—calibrate by gradually moving the degree toward the path you need to hit.
Shooting correctly at your aim will also require that you are using single pins that have been proven in the market. You can try the HHA Optimizer DS-5519 and also check out the best available single-pin options here.
In the event that you have arrived at the base change position of the extension yet need to take shots at a more drawn out distance, take a stab at moving the degree outline totally to totally bring down the actual degree. Be that as it may, this can cause issues with the distance between the extension and the rack, which will meddle with the compass of the bolt.
To watch that the blast is in the right position:
In the event that you hit the objective, however, next time your bolts hit an alternate spot, check all the screws on the degree and on the bow to ensure they are tight. In the case of nothing hangs, test your shooting method by recording it on record. Even better, have an expert glance at how you shoot to comprehend potential irregularities in the shooting method.
If your bolts hit the objective when shooting on the level landscape but fly left or right when shooting from a slope, check the degree level change.
Patience is fundamental during the tuning process, especially for less experienced archers: technical defects of various kinds can affect the results of the shots, it is therefore easy to mistakenly attribute to the viewfinder results that are instead related, for example, to defects in posture. Only patience and lots of trials, followed by very careful adjustments, especially at the beginning of your archery journey Trusted Source A beginner’s guide to archery | Life and style | The Guardian Whether you’re inspired by childhood games or Game of Thrones, archery is worth a shot www.theguardian.com , can lead to a correct adjustment of the viewfinder.
Bow shooting is quite adventurous, and the adventure becomes more interesting when you are precise and accurate with your shootings. We have talked about how to adjust bow sights to deliver these two qualities. You might also be interested in getting the best rangefinders available for bow hunting in the market today.

 About us
  Contact Us